It is one of the most important filters in a landscape photographer's arsenal: it cuts off excess polarized light, increasing the color saturation of the scene and suppressing unwanted reflections, and its effect cannot be reproduced in digital processing of photos.
In order not to delve into the wilds of the physics of light, to begin with, let's take it on faith that light is polarized by reflecting from non-metallic surfaces. The most obvious examples of such reflected light are glare and reflections on the surface of water and glass. A circular polarizing filter (we will not talk about linear ones, they are used quite rarely in photography) allows you to filter out direct reflections of sunlight at certain angles. The filtering angle is controlled by the rotation of its front element (the rear element is screwed onto the thread for filters on the lens), and the strength of the effect is controlled by the position of the camera relative to the sun.

Thus, the polarizing filter suppresses glare and reflections, allowing you to naturally increase the saturation of the colors in the picture. To the greatest extent, this effect is manifested in the sky - it becomes more saturated, and clouds are much better visible on it.
To see in which direction to shoot for maximum effect, you can apply the “rule of thumb”: point your index finger at the sun, sticking out your thumb; for maximum effect, you need to shoot in any direction in which the thumb points, if you rotate the brush around the axis formed by the index finger. Ultimately, it turns out that the polarizing filter becomes most effective when the sun is on the side of the camera.

There are several benefits to using polarizing filters, but they come at a cost.
- The saturation of colors increases as a result of the reduction in the number of direct reflections of light. This effect is the first thing that catches your eye. Saturation, however, does not always increase evenly throughout the image. The amount of the effect depends on the position of the subject relative to the sun, as well as its reflectivity - the higher it is, the more the color saturation will increase. In addition, the effect of the polarizing filter is more noticeable on a clear sunny day than on a cloudy one. There may also be problems with the uniformity of the effect when used with ultra wide-angle lenses with focal length less than 28 mm and when shooting panoramas;
- A polarizing filter is an indispensable tool for suppressing reflections. It allows you to much more clearly outline wet objects or those that are under water. This ability also makes it useful when shooting objects behind glass - in storefronts, behind windows, etc.


- It simplifies shooting scenes with a wide dynamic range, allowing you to more or less balance, for example, bright skies and dark foliage;
- When used on long lenses in particular, it is a good option for combating haze and increasing image contrast. However, if the subject itself is highly reflective, its contrast is very likely to decrease.
- A high quality filter will take your landscape photography to the next level and really add depth to your shots. On the other hand, cheap low-quality filters are likely to further reduce the contrast and sharpness of the image and catch sun glare. Also, with wide-angle lenses, you will most likely need to use thin-rimmed polarizing filters to avoid vignetting;


- The polarizing filter cuts off unnecessary reflections, which means a loss in light, and quite a significant one - a little over two stops on average. This makes polarizing filters useless when shooting in low light conditions, working at sports events. At the same time, a polarizing filter is a good replacement for a low-density ND filter, if circumstances so require. In addition, they can be used in combination with ND filters if needed.
- There is now a wide range of circular polarizing filters on the market in various qualities, available at a very wide price range - prices vary depending on lens thread diameter and manufacturer. There are decent quality solutions at an affordable price, for example.
Obviously, a circular polarizing filter is a win-win if you want to improve the quality of your landscapes. However, it is one of the most expensive species filters you find on the market, and with good reason. This is one of those "glasses" that obeys the principle of choosing a lens - it is better to invest in a good product from the very beginning and enjoy using it for years, if not decades, with proper care. There is, however, a saving option: one large-diameter filter with a set adapter rings will be enough to use with all your lenses - there is no special need to spend money on a filter for each lens.


As a landscape photographer, I often use different filters to achieve the desired effects. There are a great many filters used for landscape photography, and five such articles would not be enough to describe them all. But among them there is such a group of filters, without which, in my opinion, landscape photography is generally impossible to imagine and a camera without which is money thrown to the wind. We are talking about polarizing light filters, which we will later call “polarizers”, as it is not quite correctly accepted among the photographing fraternity.
Unlike in the past, well-known to everyone from manuals and tutorials on photography, there are now many more types of polarizers on the market than just “linear” and “circular”. So, first of all, we should deal with all the variety of these filters and systematize them, and then we'll talk about how this or that polarizer can help us when shooting a landscape.
According to the structure of the polarization grating, they are divided into linear (LINEAR) and circular (CIRCULAR). There is a strong opinion of manufacturers of photographic equipment that modern systems SLR cameras"go crazy" with linear polarizers, that is, they incorrectly determine the exposure and especially the focal length, so owners of SLR cameras are advised to use circular polarizers. This fully applies to cameras with a prism.
According to the effect produced on the image, polarizers can be divided into four groups:
Polarizers general purpose,
polarizers combined with other filters,
color changing polarizers,
filters-amplifiers of individual colors.
APPLICATION OF GENERAL PURPOSE POLARIZERS
Let's talk first about the most common general-purpose polarizing filters: linear (L-PL) and circular (CIR-PL).
The use of these polarizers has three features to keep in mind. The first feature is that the efficiency of their filtration depends on the angle of rotation of the filter relative to the axis, and varies from zero to the maximum degree. At the same time, the transmitted light factor for most polarizing filters is 4, which leads to the need to increase the exposure by 2 steps. It is important to know that the transmitted light factor does not depend on the degree of filtration, that is, on the angle of rotation of the filter relative to its axis.
The second feature of the application is the uneven location of the polarized regions of the sky: in a clear sky, the light will be most polarized in areas that are at an angle of about 90 degrees from the sun in both directions, that is, on our right and left hands, if we stand facing or back to the sun. Check: point the camera at the specified area, rotate the filter until you get the maximum effect, then turn in the direction diametrically from the sun: the effect is gone. Therefore, when shooting sunsets and the picturesque eastern sky at sunset against the sun, this filter will not help you. When shooting water surfaces, you can find the most optimal location by experimenting by wandering around or along a selected area of the reservoir and rotating the filter around the optical axis. It is also important to do this in the absence of waves, which, due to their curvature, reflect different parts of the sky.
The third feature of the use of these filters is their stubborn unwillingness to work in diffused lighting, since in such a situation there are no directional reflections of the light flux, therefore, in cloudy weather, these filters will not have any effect on the color or brightness of the sky.
As was said, conventional polarizers to some extent delay  reflected rays. I will say right away that not a single filter detains them entirely. Is it necessary? I use them for scenery shots of blue skies with or without clouds (look at the photo), water shots, and also get good results with sunlit buildings, freshly painted surfaces, rainbows (at an angle of about 135 degrees from the sun) and sunlit urban areas. streets right after the rain. By blocking the reflected rays, the filters “darken” the blue sky, leaving the clouds white; make the water transparent, no matter what kind of water is in front of us: Lake Baikal or a puddle on the pavement after rain.
It is good practice to use polarizers when shooting flowing water using a tripod. The fact is that in order to obtain the effect of a “milk river”, an expopara close to f22 and 1/2 sec is needed. Getting such exposure in bright, sunny weather is often not possible, and therefore photographers sometimes use a neutral gray filter (ND) to reduce the brightness of a scene. Keeping in mind that a polarizer also reduces light significantly, I prefer to use it instead of a gray filter where possible, while getting both extended exposure time and richer color in the water and other visually active elements of my shot.
When buying a polarizer, make sure that it does not have any extraneous residual color (for example, blue, pink, etc.): the polarizing filter must be neutral gray.
POLARIZERS COMBINED WITH OTHER FILTERS
In addition to the usual polarizing filters mentioned above, in stores you can find polarizers combined with other filters. I adhere to such a rule that if you can do without a filter at all, then you need to shoot without it, and if you choose between two filters and one in which both are combined, then you need to shoot with this one. Always remember that each additional filter slightly degrades the image quality. Hence the purpose of polarizers combined with other filters is clear.
An example of such a polarizer is the Hoya UV-PL-CIR filter already mentioned, which combines a circular polarizer and an ultraviolet filter, combining the polarizer's ability to increase contrast and color saturation with the UV filter's ability to absorb ultraviolet rays.
Another example is Tiffen's Warm Polarizer, a polarizer combined with an 81 series "warm" filter.
We should also mention filters 161-163 from Cokin, which are circular polarizers, colored in different colors (pink, blue and yellow, respectively). I must say that the effect produced by these filters is somewhat specific: take filter 162 (Polacolor Blue) as an example: when the filter is rotated around the axis, the picture changes from slightly bluish with slightly bluish reflections to slightly bluish with dark blue reflections. That is, it does not “darken” the reflections, but, as it were, “shadows” them. Filters of other colors - respectively. Working with these filters requires good practice, but can lead to good results, better in unbalanced lighting or in a monochrome scene, such as a winter landscape, for example.
COLOR-CHANGING POLARIZERS
As I said at the beginning of the article, some polarizers do not stop the reflected rays, but transform them. Such miraculous filters that most immorally introduce an element of the creative process into landscape photography include polarizers that change the color of the reflective surface. The most affordable of them are the filters of the French company Cokin series 170-174.
 |
 |
|---|
Their task is to change the color of reflections in the range of working colors of the filter when it is rotated around the optical axis (see the photo above with different positions of the Cokin 173 Varicolor Blue/Yellow filter: in fact, the asphalt was of an ordinary gray color). So, for example, filter 170 (Red/Green) at one position colors all reflections (and the sky, of course) red, and when it is half-turned around the optical axis - green. You have to be very careful with these filters, as they all have the unfortunate side effect of the aftercolor of the filter itself, which changes from pink for Blue/Yellow to ruby for Red/Green. The residual color of the filter does not depend on the angle of its rotation.
However, if you know these features of these filters and be able to use them correctly, you can get pretty good work. So, when using the same filter Cokin 173 Varicolor Blue / Yellow, you should remember about its primary colors - blue and yellow, and about the residual color - pink. If you manage to find a scene where all these three colors could be harmoniously combined, then as a result you can get a rather interesting and unusual landscape (in the bottom photo on the left the filter is not applied, on the right the Cokin 173 Varicolor Blue/Yellow polarizer is used).
 |
 |
|---|
FILTERS-AMPLIFIERS OF INDIVIDUAL COLOR
In conclusion, let's talk about filters - amplifiers of individual colors. In terms of the fact that these filters generally apply  to the group of polarizers, I use the opinion of Cokin, although I do not quite share it. But to miss a great opportunity to talk about these magic filters here would be extremely unforgivable. The purpose of these filters is to saturate one or a group of similar colors without affecting other colors. In the photo on the right you can see the result of using the red color enhancer filter.
In the catalogs of various manufacturers there are filters-amplifiers of red (Redhancer, Intensifier), green (Greenhancer, Green Field), blue (Bluehancer, Blue Intensifier) and other colors.
The use of these filters in landscape photography creates interesting creative possibilities, these filters are good for shooting sunsets, grassy meadows and autumn landscapes. They are also great for urban landscapes, including night ones.
When using these filters, it is worth remembering some of their features. First, the quality of these filters varies widely across  depending on their manufacturer. Having bought, for example, a Redhancer filter for $30-40, you get a real red tint enhancer that does not leave any extraneous tint on the film, and for $16 you will most likely be sold a filter with the same name, but giving an irreducible pink tint on the film. negative. To an even greater extent, the problem of extraneous tonality concerns filters that saturate blue and green colors.
This problem becomes almost insurmountable when shooting on positive films with high color saturation. Look at the photo above: when using a Kodak Gold 100 negative film and a Redhancer filter, no extraneous tint is noticeable in the picture, while in the photo of a cobweb in the forest, with the same filter on Fuji Velvia slide film, a pink tint is clearly visible . Extraneous tonality in such situations has to be corrected when printing in a professional laboratory.
An important feature of Redhancer filters is their ability to saturate not only reds, but also enhance blues and grays. Therefore, if you have a scene built on the contrast of these colors, then applying the Redhancer filter will allow you to enhance the effect of the picture. For example, look again at the photo with the red bus.
Interesting possibilities are provided by the use of these filters together with conventional polarizers, in which case their effect is doubled. An example of such an experiment can be seen in the photo given at the very beginning of the article or in the photographs below: the left one was taken without filters, the right one - with a circular polarizer and a Redhancer filter on Fuji Velvia film.
 |
 |
|---|
Unity is built from nuances. It is the details that make up the whole. Light filters, it would seem, do not play a decisive role in creating the final image, but they can give it uniqueness and originality.
Long before man, the phenomenon of polarization of light was mastered by Live nature. Some seabirds, when hunting, close their eyes with a special eyelid, which reduces the reflection of light coming from the sky from the surface of the water, and the prey becomes more visible. Many insects, such as bees, orient themselves in space by the degree of sky polarization. It is enough for them to see a small piece of blue sky in the breaks of clouds in order to accurately determine the direction. Around us there are always both natural and polarized light. The human eye and film perceive them in the same way. The use of polarizing filters allows you to isolate polarized light and use it creatively in photography.
A polarizing filter enhances visual sharpness and color purity in photographs. Yes, at landscape photography the foliage of trees, in addition to its own diffuse reflection, also has a specular reflection of the blue light of the sky. A polarizing filter eliminates glare. Due to this, the own color of objects appears better in the photo, the color saturation increases, and the bluish tint disappears from the leaves. Decreasing ambient light exposure slightly increases contrast, resulting in a visual increase in sharpness.

The propagation of light is a wave process, similar to waves on the surface of a pond from a stone thrown into the water. Only usually fluctuations in the intensity vector of a light wave (light is a transverse electromagnetic wave) are not limited to one plane, as in the case of the water surface, but occur in all directions (perpendicular to the direction of wave propagation). However, it is possible to artificially make these oscillations occur in one plane. In this case, such light will be called linearly polarized and will have some properties different from natural (unpolarized) light. According to the nature of the impact on the eye or film, linearly polarized light does not differ from unpolarized light. There is only one way to determine the degree of polarization of light and the direction of its polarization - by looking at it through an “analyzer” - a medium that transmits only light polarized in one plane and, accordingly, absorbs light polarized in a perpendicular plane. The polarizing filter used in photography acts as an analyzer. It is a plate special material, polarizing light (for example, crystals of herapatite), reinforced between two optically flat glasses. This whole “sandwich” is mounted in a special rotating frame, on which a mark is applied with one or two points showing the position of the filter polarization plane. How and why can these wonderful properties of a polarizing filter be applied?
Polarization of light can also occur in natural conditions - with specular reflection from any non-metallic surfaces. Natural light, being initially unpolarized (more precisely, chaotically polarized, that is, consisting of a mixture of waves with different polarization directions), upon specular reflection from non-metallic surfaces, acquires the properties of linearly polarized light. Physically, this is explained by the fact that for light with different directions of polarization relative to the surface, different conditions are created during specular reflection from a non-metallic surface. The most favorable conditions for reflection are for light with polarization parallel to the plane of incidence - such light is reflected without loss. Light with a different orientation of the plane of polarization is more or less extinguished upon reflection.
Therefore, the most obvious use of a polarizer is to eliminate (or at least reduce the intensity of) the glare that forms on shiny non-metallic surfaces, such as glass showcases and windows, painted or plastic-coated surfaces, the surface of the water, and so on. Using a polarizing filter is quite simple - after all, the effect it produces is noticeable to the eye and clearly visible in the camera's viewfinder. In this case, the only thing that is desirable to know from the theory is that the degree of polarization of the reflected light varies with the angle of incidence (reflection) of the light. The angle at which the polarization of the reflected light reaches its maximum depends on the material of the reflecting surface and is usually 50-60 degrees from the normal of the reflecting surface (respectively - 30-40 degrees from the surface itself). Therefore, in order to completely eliminate unwanted reflection from a shiny surface using a polarizing filter, it makes sense to choose the direction of shooting in such a way that the reflective surface (glare from which it is supposed to be removed) is located at an optimal angle to the camera.

A polarizing filter is also very effective in cases where the surface of the object being photographed has a mixed specular-diffuse reflection character. Quite a bit of time is enough to find a lot of objects around you, the surface of which has this type of reflection. With different orientations of the filter polarization plane, the color hue of many objects changes, their color becomes richer and more saturated. The main thing here is not to overdo it, because objects completely devoid of glare look shapeless. And the color of some objects can change quite significantly, going beyond the limits acceptable for perception.

In addition to such an obvious example of using a polarizing filter, there is also a lot of not so obvious, but no less successful and effective ways its applications - polarized light is present around us in large quantities. The blue sky, for example, owes its color to the scattering of the blue-violet part of the sun's light by tiny droplets of water that make up atmospheric haze. And since the reflection of light from the surface of each droplet has the character of a specular reflection from a non-metallic surface, the light coming from the sky turns out to be linearly polarized. Therefore, by choosing the appropriate shooting direction, you can use a polarizing filter to make the blue sky much darker without affecting the reproduction of other landscape details. The maximum effect of applying the filter is achieved when the sun is at an angle of about 90 degrees to the shooting direction, and the filter's polarization plane is set to a horizontal position. By the way, the same principle is used in sunglasses manufactured by the Polaroid corporation.
The multiplicity of the polarizing filter is on average 3-4, that is, the use of a polarizing filter requires an increase in exposure by 1.5-2 steps (3-4 times) compared to exposure without a filter. Despite the effect introduced by the rotation of the filter, the filter multiplicity, as a rule, does not depend much on the orientation of the filter's polarization plane - after all, a polarizing filter is used to reduce bright glare, the dimensions of which are most often small. Of course, full confidence in the accuracy of exposure with a filter can be obtained by measuring light using the TTL system. However, many cameras that have a TTL light metering system use optical elements to separate the light flux, which themselves polarize light. For example, in autofocus cameras, such an element is often translucent areas on the mirror, which are necessary for the operation of the sensors of the autofocus system (located under the mirror). In this case, it turns out that the light that has passed through the polarizing filter, being already almost 100% polarized, passes through another polarizer on its way to the metering sensor. That, in turn, when the polarization planes do not coincide, further weakens the light flux, which means that it introduces an undesirable “correction” into the exposure metering system of the apparatus, leading to an underestimation of the exposure meter readings and overexposure of the film. You can get around this trouble by using a specially modified polarizing filter, called “circular” (as opposed to the usual “linear” polarizer). The design of the circular polarizing filter, in addition to protective glass plates and a polaroid plate, also includes a “1/4 wavelength” plate, which converts linearly polarized light into circularly polarized light, which is no longer attenuated upon further passage through the optical elements of the camera, which have properties of a linear polarizer.
Let's not disregard the fact that the circular polarizing filter is identical to the linear one (with the only exception, which will be discussed below) both in terms of the functions performed and in the methods of handling it. They can be distinguished only by the corresponding inscription or by the fact that the circular polarizing filter darkens the glares only when unfolded by the connecting thread to the eye (or lens), and the linear polarizer works equally in any direction.
To reduce the number of filters used at the same time (from an extra pair of air-glass boundaries and an extra height of the frame, there is no benefit), sometimes “hybrids” are produced that have the properties of a circular polarizing and, for example, ultraviolet (UV) or conversion (85V) filters simultaneously.
Polarizing filters can be used not only one by one, but also in pairs, using as a neutral density filter with variable density. By rotating one filter relative to the other, it is possible to change the light transmission of such a pair over a wide range - from a minimum of 3-4 steps (when the polarization wear of both filters are the same) to an almost opaque state, when the polarization planes of the filters are perpendicular - while the light is attenuated by more than 12- 15 steps 4000-30000 times). When using this combination, you need to remember that the outer (first in the direction of light) polarizing filter must be linear, and the one closest to the camera (in the case of an autofocus device) must be circular.
Some manufacturers produce ready-made instructions based on the use of several polarizing filters at the same time. HOYA, for example, produces a variable optical density POL-FADER attachment (two neutral-color polarizing filters in one frame).
In addition, when using a combination of polarizers colored in different colors with neutral-colored polarizers, it becomes possible to create filters with a variable color density.
The PL-COLOR filter, which allows you to select the color saturation of the filter from neutral to fully saturated, consists of a polarizer with a neutral color and a second polarizer tinted in saturated blue, yellow, orange or red.
The combination of two polarizers colored in different colors and one polarizer of neutral color is available under the name VARIO PL-COLOR and allows you to further diversify the effect, allowing you to easily change not only the saturation of the filter color, but also its color when you rotate the filter barrel.
HOW TO USE THE POLARIZING FILTER
 Photo 1 When shooting an extensive scene, when polarized light affects all the details, (it looks like an example in photo 1), a picture with low contrast is obtained, as if the eyes of the observer are half-closed |  Photo 2 By cutting off the range of polarized light reflected from the clouds with a CPL filter, we get the pure colors of clouds, blue skies and mountains in the photo. Just attach a CPL filter to the lens and you will get a great effect. |
|
 Photo 3 An object with bright colors, observed in polarized light, looks like in photo 3, where the colors are muted |  Photo 4 By limiting the polarization with a filter, as in photograph 4, it is possible to accurately reproduce the vivid colors of an object. |
|
 Photo 5 The sky or a house captured on the water surface interfered with the composition |  Photo 6 If applied, solves the problem with surface glare |
|
 Photo 7 The steering wheel behind the glass is hard to see due to reflections in the window. |  Photo 8 If the reflections on the glass surface are cut off by the CPL filter, it is possible to shoot the steering wheel behind the glass with almost no reflections. |
To achieve the effect of removing unwanted reflections by polarizing light, a change was required: a double filter frame with a triangular marker to control the rotation angle of the outer frame when searching for the required polarization angle. * - Some frames - do not have a marker!
CHANGING THE POSITION OF THE MARKER ON THE RIM
When rotating the polarizing filter, it must be taken into account that the expected zone of maximum effect will be approximately 90 degrees from the initial position. Rotating 180 degrees will return the image to its original state. For example, if the sun is exactly above you, the polarization effect will be observed in the range (we are guided by the arrows wrist watch) from 12 to 6 "hours", and in the worst way it will appear from 3 to 9 "hours" on the dial.
Photos 9-12 illustrate the effect of turning the frame with a constant direction of the object and a constant position of the sun:
When you change the position of the marker on some models of polarizing filters (as in photos 10-12), the contrast of the image also changes. Efficiency is not always the same and fine tuning is up to the photographer anyway. For example, in photo 10 the contrast is too weak, and in photo 12 it is too strong. It is possible that the 11th half effect photo will be the best.
CHANGING THE EFFECT BY SHIFTING THE DIRECTION TO THE OBJECT
Not only changing the position of the marker affects the manifestation of the effect of removing unwanted glare and reflections - you can change the direction of the lens to the object.

When photographing outdoors, it must be remembered that the effect of polarization depends both on the angle of elevation of the sun and on the angle at which the lens is directed at the object. If the sun's rays fall to the surface at an angle of 90 degrees, the effect will be weak. Backlight (that's 0 degrees, straight ahead) and backlight that's 180 degrees) barely allow the effect of the polarizing filter to show up.
Photos 13 and 14 were taken from a fixed tripod, only the tripod head with a fixed camera moved. In both cases, the marker on the filter remained at 12 o'clock. In photograph 13, the lens angle to the incident light was close to 0 degrees and the effect of the polarizing filter was almost imperceptible. On the other hand, in image 14, taken with the lens axis positioned approximately 90 degrees to the direction of light incidence, the polarization effect is excellent. Saturated colors appeared in the photo. In addition, when shooting reflections from a water surface or glass, as in the photo on the left, when the lens is directed to the surface at an angle of 30 - 40 degrees, the effect of removing clutter from the plane of the object is best displayed.
 |
 |
POLARIZER IS EASY TO DAMAGE

Under direct sunlight and when moisture gets on the polarizer, fading occurs with reddening and discoloration of the neutral gray (normal) polarizing film - as on the filter marked X in Photo 15. The filter will begin to “redden” white objects (example? Photo 15 in Photo 15). 16). In Photo 17 you can see the result of the operation of a normal polarizer (0 is marked in Photo 15). With fading, the color balance is disturbed and cannot be controlled, as is the contrast of the image. Most often, fading occurs after 5 to 6 years of use. In other words, after 5 - 6 years, the filter will need to be bought a new one.
WHEN WORKING WITH WIDE ANGLES
A wide-angle lens has such a large field of view that only filters in thin frames do not affect the image at the edges. Polarizers are commonly used (in 35mm photography) on optics with focal lengths over 24mm. The photographs (18 and 19) below were taken with a digital camera with a wide-angle lens with a focal length of 14mm: in terms of a 35mm photograph, this is 21mm. In Photo 18, the vignetting effect (darkening of the frame at the corners) is clearly visible. In Photo 19, which was taken with Wide thin frames (see note *1 below), no shading occurs. Wide CPL, narrow framed polarizer (see note *2 below) is just that. Additionally, when working with a polarizer at a wide angle, remove the protective filter from the lens - “the polar should come first”, if possible.
 |
 |
ADD ONE STOP OF EXPOSURE COMPENSATION
For polarizers, it is very useful to add 1 correction step to the set automatic for a greater manifestation of the polarization effect. Since the resulting exposure may be up to 3.5 stops longer, beware of subject blur due to camera shake at slow shutter speeds. On devices with the ability to lock the exposure, on those where the focus points are connected to the metering points, there is another important secret. Turning the filter barrel after exposure lock will, in most cases, cause the correct exposure to fail.
POLARIZING LIGHT FILTERS OF DIFFERENT MANUFACTURERS
In almost every manufacturing company, you can find polarizing filters of the same type for a different price. The cheapest ones are a regular glass filter in a standard thick frame. Models with an antireflection coating will cost a little more. Enlightenment increases the light transmission of the filter and improves the sharpness of the image. The most expensive filters are made in a thinner frame, which avoids vignetting on wide-angle optics or when using several filters at the same time.
For the test, we collected all commercially available polarizing filters from leading manufacturers. These are mainly circular filters: B+W MRC Circular Pol, Cokin Digital Polarizer, Heliopan Polfilter Circular, Hoya Circular Pol, Kenko Circular PL, Kenko Pro 1 Digital, Marumi DHG Cicular PL(D), Marumi MC Circular Polarizer, Marumi WPC- CPL, Soligor Circular Pol, Soligor DHG Circular Polarizer, Tiffen Circular Polarizer. In addition to the legendary Soviet-made PF filter, Promaster Spectrum 7, Raynox Digital Polarizer and two Tiffen filters - Low Light Polarizer and Warm Polarizer - have linear polarization.
Cokin color polarizing filters were also tested: models P162, P163, P170, P171 and P173. Their purpose is not to eliminate glare, as in the case of conventional polarizers, but to color them: depending on the angle of rotation of these filters, the color of the polarized light changes. Let's take a closer look at the phenomenon of light polarization, and also figure out how a polarizing filter works and what affects the quality of the resulting image.

Any light filter installed on the camera lens reduces the sharpness of the image. We measured the effect of filters on resolution on an optical bench. The image of the target focused by the reference lens was examined through a microscope. As a result, it is possible to evaluate the drop in resolution after installing a light filter on the lens. A decrease in distinguishable target lines by one group corresponds to a decrease in resolution by 5–6%. Practically for all filters, with the exception of a few models, a drop in resolution was either not observed, or it amounted to one group of worlds. This is within the instrumental error of the equipment. It should be noted that laboratory tests do not always give a complete picture of filter characteristics. Backlight, light sources and bright reflections in the frame, the effectiveness of the lens hood at a long focus - all this can lead to noticeable light scattering and in real shooting situations have a much greater impact on resolution.
For photographers, a large number of linear polarizing filters are available. Most often they consist of a thin polymer film sandwiched between two glasses. The filter can be rotated in the frame after being mounted on the lens.
Inside the camera, light rays undergo various reflections on their way to the autofocus and exposure meters, and this also causes light polarization. In the case when the planes of reflection and polarization of the light filter intersect, the light stops coming to the photocells and the automation starts to work incorrectly or turns off completely. In this case, you have to switch the camera to manual mode or purchase a circular polarizing filter.
It is a combination of two filters. Outside there is an ordinary linear polarizer, and on the side of the lens there is a second light filter, which turns the linear polarization of light into circular. It works as follows.
The linearly polarized light incident on it undergoes birefringence. At the output of the filter, two beams are obtained, linearly polarized in perpendicular planes. The phase difference between them is a quarter of the wavelength, as a result, the total vector of the polarization plane changes direction in a circle.
Thus, when shooting, glare is eliminated with an external linear polarizer, and the inner surface of the filter makes the light seem to be unpolarized, which ensures the operation of the camera's automation regardless of the position of the filter. Differences in ways practical application there are no linear and circular polarizing filters.
Recently, due to the spread of automatic cameras, classic linear polarizing filters have disappeared from store shelves. But there is no difference in the quality of the image created by linear and circular filters. The difference is only in price - circular ones are about twice as expensive.
Of course, it is convenient when the camera's TTL system is always on. But, as a rule, if during shooting there is time to install a polarizing filter and search for its position on the lens, then a couple of seconds in order to manually focus the camera and measure exposure, there will always be.
I would like to mention another successful marketing ploy. There are no differences in the use of a polarizing filter on a film and digital camera.
At the same time, the appearance in the catalogs of companies of polarizing filters with the inscription “Digital” on the frame is “pleasant”. Naturally, at a higher price.
Several exotic polarizing filters stand out from the crowd. Tiffen Low Light Polarizer is twice as bright as a regular polarizing filter. When it is mounted on a camera lens, it is required to increase the exposure by only 2/3 stops. Its degree of polarization is weaker than usual, so it will not be possible to completely extinguish the glare, it will only be possible to slightly reduce their brightness.
Another filter - Tiffen Warm Polarizer - has a warm tint. It is a combination of a polarizing filter and a 81B conversion filter. When shooting in daylight, it will further lower the color temperature from 5500 K to 5000 K. Warm color balance is often used by photographers. Reversible films with a slight color temperature shift, gold reflector backlighting, as well as this filter, provide more pleasing skin tones in portraits.
The effect created by these filters is quite easy to recreate on a photograph by conventional means or by processing in graphics editor. The attenuation of polarized light with a Tiffen Low Light Polarizer filter can be obtained by adjusting the angle of rotation of a conventional polarizing filter. The dignity of the former remains only in its small multiplicity. The effect of applying the Tiffen Warm Polarizer filter is also easy to simulate on a computer. For example, you just need to change the color balance when converting a RAW file.
It should be noted that Tiffen is known on the market, first of all, as a manufacturer of filters for professional cinematography. Only some samples of its products eventually begin to be produced in photographic format. These filters will be more in demand by film and videographers than by photographers.
The economic factor is decisive - cameramen usually do not purchase filters themselves, but order the equipment necessary for shooting a given frame at the expense of the film's budget. In the case of low light in film and video shooting, the Low Light Polarizer filter will be invaluable. Indeed, in cinema it is impossible to adjust the exposure by increasing the shutter speed.
Renting one Tiffen Warm Polarizer filter is more profitable than ordering a polarizer and a conversion filter separately, not to mention the possible casketing of the frame when such a “sandwich” is mounted on the lens.
Color polarizing filters from Cokin deserve special attention. (Unfortunately, it was not possible to get similar light filters from other manufacturers for comparison.) They do not eliminate glare, but allow you to change their color when you turn the filter.
USING A POLARIZING FILTER IN LANDSCAPE
 |
 |
In one position, the filter darkens the sky well. When the filter is rotated 90 degrees, the sky brightens, but the reflection in the water disappears. In equatorial latitudes, the filter will simultaneously darken the sky and “dead” the water, which is not as expressive as in our area. Pay attention to the change in the color of the monastery wall due to the elimination of reflected light, as well as the change in sharpness and the development of the grass in the foreground
The intrinsic color of these filters is very saturated. For example, even the Minolta IIIF colorimeter could not cope with the determination of the color of the Cokin P171 filter. However, digital Nikon cameras The D70 and Canon EOS-20D were able to balance through these filters with no problem. To shoot on film, it would be necessary to install a few more compensation filters on the camera lens, which would lead to a strong increase in exposure and decrease in sharpness. You can leave the natural balance of the camera when shooting, but then the entire image will be painted in the color of the filter, which is not suitable for every scene.
Cokin color polarizing filters are also more in demand in film and video production than in photography. In a static image, the coloration of the flare is easy to obtain by installing a light filter on the lighting device. When shooting landscapes, these filters color all polarized light, which is present not only in the sky, but also in the reflection from ground objects. As a result, the effect of this filter is comparable to that of a conventional color filter. In film and video shooting, by turning the filter, you can change the color of highlights within one shot and thereby create the desired mood. The most commonly used filters are Cokin P162 and P163. Their effect does not hit the viewer's eyes, but allows you to give highlights a cold or warm tint. Cokin 170 series filters are too colored. It is rather difficult to substantiate in a plot why the reflection suddenly turned green or reddened. However, the combination of these filters with the usual "polaroid" creates a variable color filter. For example, the Cokin P171 filter, mounted on a lens together with a linear polarizing filter, turns into a variable conversion filter.
Any polarizing filter requires very careful handling. Do not expose it to sudden changes in temperature and pressure. When flying on an airplane, try not to take optics and light filters in your luggage. Due to uneven thermal expansion, the filter may become unstuck and unsuitable for shooting.
Particular attention should be paid to the temperature regime of storage. Direct sunlight, heat, moisture on the filter may cause the polymer film to fade. Such a light filter acquires an irremovable reddish tint and needs to be replaced. By the way, according to information from manufacturing companies, the average life of a polarizing filter with frequent use is 5-6 years. Although practice gives more optimistic results.
TESTS OF POLARIZING FILTERS OF DIFFERENT MANUFACTURERS
Laboratory tests
We evaluated the main parameters of light filters, the most important for practical use.
 |
 |
|
B+W Circular polarizing filter in a standard frame with an anti-reflective coating. |
cokin Circular polarizing filter in a round threaded frame. There is an anti-reflective coating.> |
 |
 |
 |
 |
 |
 |
|
cokin Color polarizing filter. When rotated on the lens, it colors the highlights blue. |
cokin Color polarizing filter. When rotated on the lens, it colors highlights yellow. |
 |
 |
|
 |
 |
 |
|
cokin Color polarizing filter. Depending on the angle of rotation, it changes the color of highlights from red to green. |
cokin Color polarizing filter. Changes the color of polarized light from orange to blue. |
 |
 |
 |
 |
 |
 |
|
cokin Color polarizing filter. Changes the color of polarized light from blue to yellow. |
Heliopan Circular polarizing filter in a thin frame without antireflection coating. |
| Exposure compensation, EV | 2 |
| Chromaticity of the conversion filter (LB), mired |
-2 |
| Color compensation filter (CC), % |
0 |
| Sharpness reduction, % | 0 |


 |
 |
|
Kenko Circular polarizing filter with antireflection coating. Frame of medium thickness. |
Marumi Circular polarizing light filter in a thin frame with an anti-reflective coating. |
 |
 |
 |
 |


So what is this animal anyway? As promised, there will be no theory and lessons in physics from the "Optics" section.
Today it is impossible to imagine photographing landscapes without polarizing filters. To make your landscapes look juicy and clear without additional processing, you need to use a polarizing filter.
Polarizing filter- this is a filter consisting of 2 rings in one of them there is a specially processed glass (polarizer), by rotating the ring with polarizing glass, you can adjust the degree of polarization. This filter allows you to remove glare from glass or water while shooting, retaining the reflected rays. The filter also allows you to get more saturated pictures, on which clouds will be more drawn, vegetation will look more juicy, here, everything is like with water, the air contains water particles that reflect light, hence the pictures without a filter are dull, not always blue sky, and "indistinct" clouds.
Types of polarizing filters.
There are two types of PL filters according to the polarization method: linear (PL) and circular (CPL). For most cameras with manual focus linear polarization filters are intended, for autofocus cameras - use circular (CPL) - filters. CPL filters are a bit more expensive than linear filters for the price. But Circulars by no means stop the camera's autofocus and exposure metering from doing their job. Designed for wide-angle lenses, Wide-CPL filters with a narrow frame prevent vignetting (darkening at the corners of the frame). Some PL filters are protected with a water-repellent coating that does not affect the operation of autofocus and exposure controls.
Using a polarizing filter.
Just screw the filter of the required diameter onto the lens of your photo/video camera. By rotating the crystal in the filter, select the desired degree of polarization, which will allow you to remove glare from glass or water when shooting, as well as get a more saturated sky and whiter and fluffy clouds ..... enough words, let's look at examples.
But of course there are some restrictions on the use of such filters.
1) When rotating the polarizing filter, it must be taken into account that the expected zone of maximum effect will be approximately 90 degrees from the initial position. Rotating 180 degrees will return the image to its original state.
For example, if the sun is exactly above you, the polarization effect will be observed in the range (we are guided by the hands of a wrist watch) from 12 to 6 "o'clock", and in the worst way it will manifest itself from 3 to 9 "o'clock" on the dial. Having tried it in practice, you will immediately understand everything.
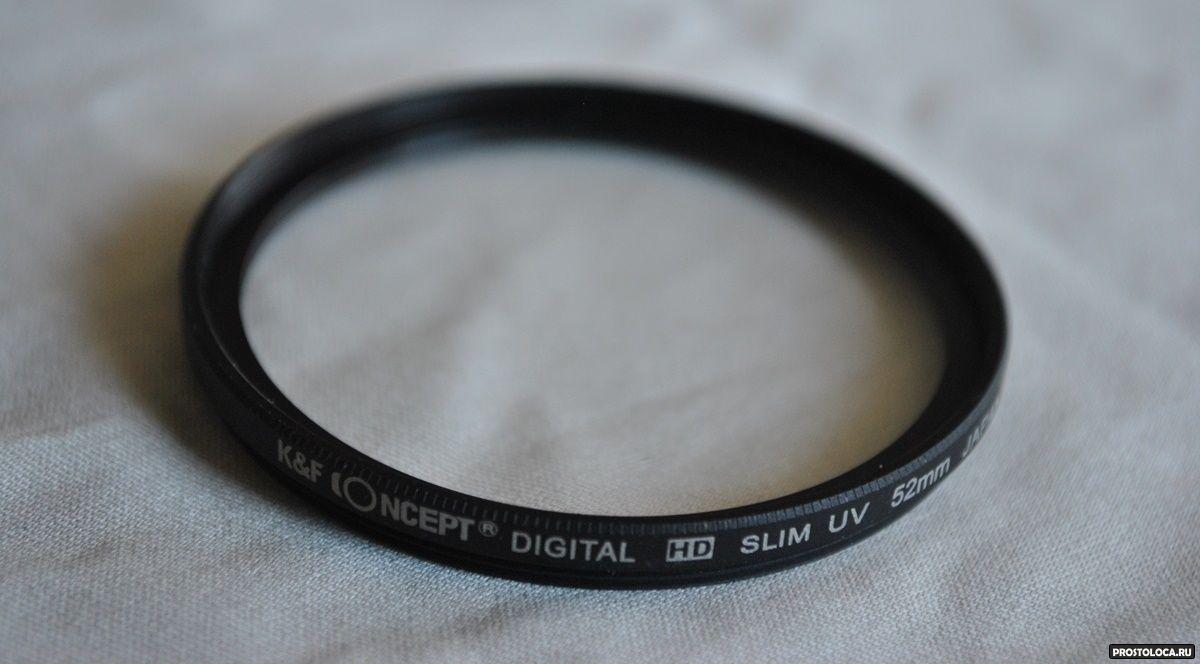
Not so long ago, a desire arose in me to slightly ennoble my Nikon D3000 and order an appropriate lens hood with a diameter of 52 mm for it. The main task of this overlay on the lens is to correctly cut off the light, in addition, this thing indirectly serves as protection for the lens from bumps and scratches. It so happened that I made the purchase remotely via the Internet, and buying a lens hood separately was not as profitable as ordering a whole set: three filters per lens, four false lenses, a lens hood and a protective cover.
Two weeks later my parcel arrived, but the fact is that before this purchase I had not had to use light filters, and the knowledge of what they were for was purely theoretical. Today I invite you to see with me what happens when shooting with various filters, and together figure out what they are for.
Popular lens filters
Polarizing filter
The first filter I would like to talk about is polarizing. You can see it in the photo below.
Polarizing filters are used in digital photography most often. These filters are abbreviated PL (CPL, LPL) and their main task is to reduce the amount of reflected light that hits the camera sensor. Polarizing filters reduce the brightness of photos and increase their saturation.

There are two types of polarizing filters: circular (CPL) and linear (LPL). Linear polarizing filters reduce polarizing light less effectively than circular ones, but they can be placed at any angle, while circular polarizing filters must be placed at right angles to the optical axis.

Circular (circular) filter is a system of two mandrels: mandrel with glass + mandrel. The mandrel with glass rotates freely, and by turning it at a certain angle, we manage to achieve the desired effect.

However, polarik should be used with care and skill. Do not use it as a protective filter for the lens and wear it without removing it. A polarizing filter can have a negative effect on the picture, as it steals light a lot - increasing the risk of blurring photos when shooting without a tripod.
FLD filter (fluorescent light filter)
The second light filter that came with the kit is the FLD filter. It has a bright purple hue.

What is it for? It reduces or completely eliminates the unpleasant greenish tint that appears in pictures where fluorescent lights appear.

You can use it when shooting cityscapes at night. FLD filters were originally created for shooting with film cameras, and they are not needed for digital photography, especially in RAW format. So I won't be using this filter.
UV filter
The third and final filter included is the UV filter.
The UV filter is most commonly used today as a protective filter. The UV filter has no effect on the image (ideally) and can be used during any type of shooting. On film cameras, a UV filter increases contrast and reduces haze, but in the era of digital photography, almost no one shoots with such cameras.
It is very important that the UV filter is of good quality and kept clean, as it can significantly degrade image quality and add unwanted reflections.
Should I use a UV filter? If you are the owner of an expensive lens, it is desirable to have such a protective filter, because it is easier to replace it than to repair the lens. If your camera is amateur, then you should think about the advisability of using it.
To summarize: of the three filters included in the kit, the most necessary is a polarizing filter, the most commonly used is a protective UV filter, and the useless one is a FLD filter.
Ilyina Marina Andreevna 986
The effects of most filters used in modern photography can be replicated in a photo editor. Sometimes the imposition of filters during processing is even more preferable than their physical application. But for a polarizing filter for a camera, this statement is not true. Moreover, the effects achieved with it are often completely impossible to achieve using a computer.
A polarizing filter is a fairly complex design. It consists of two glasses, between which a polaroid film coating is applied. The inner glass is attached to the camera lens, and the outer glass rotates freely around its axis. It is due to this rotation that a greater or lesser degree of elimination of polarized light is achieved.
 |
Galc.ru | 990 R | |
 |
Galc.ru | 1 390 Р | |
 |
Galc.ru | 1 252 Р | |
 |
Galc.ru | 1 050 R | |
 |
Galc.ru | 1 590 R | |
 |
Galc.ru | 900 R | |
| More offers | |||
It is also important to note that a polarizing filter does not work equally in all directions. It manifests itself most strongly if the light source (usually the sun at landscape photography) is at a 90 degree angle to the shooting direction. If the light source is in front of you, or behind your back, the polarizer will not give any result in any position of the outer glass.
Based on the principle of the filter, let's consider the effects that it allows you to get.
It is, above all, a deeper blue hue of the sky. At the same time, glare from small water particles and dust, on which sunlight is scattered, is eliminated, leading to sky flare.
Flowers, green foliage, grasses and pine needles also look much juicier: thanks to the polarizing filter, the cold glare cast by the sky disappears.

And, of course, with a polarizer, you can shoot through the glass and look under the water column: reflections on the surface no longer bother you.

 |
Galc.ru | 903 R | |
 |
Galc.ru | 1 190 R | |
 |
Galc.ru | 903 R | |
 |
Galc.ru | 862 R | |
 |
950 R | ||
| More offers | |||
Polarizing filters also have their limitations.
For example, shooting on a cloudy day with it, when all the light can be called scattered, will not give any noticeable result at all.
And combining a PL filter with a wide-angle lens will give the effect of uneven darkening of some parts of the photo - alternating dark and light spots. This can be combated by using Wide PL filters, that is, thin-mounted polarizing filters specially designed for wide-angle lenses. Such "wide" filters allow you to create those pictures that will then be "glued" into panoramas.

Also, polarizing filters can significantly increase shooting time, to the point that it becomes necessary to use a tripod.
Plus, the polarizer "does not know how" to eliminate glare from metal surfaces. And, most likely, you will be unpleasantly surprised when taking pictures from an airplane window and through an uneven or dirty glass surface: optical effects can cause amazing streaks to appear in the photo.

When choosing a filter for a digital camera with autofocus, pay attention to whether it belongs to the class of circular or circular (the letter C (CIR) must be present in the abbreviation of the name). Otherwise, your camera's autofocus will not function. If you shoot on film or use a “soap” camera, then a cheaper version of the polarizing filter is also suitable for you - a linear filter (abbreviation - PL).
tell friends


How to disable ads on Android: remove pop-up ads
The Russian received a term and a million fine for "piracy Negative consequences of the law
Identification of key factors
The criteria for classifying organizations and individual entrepreneurs as small and medium-sized businesses have changed
See what "Royalty" is in other dictionaries Pitfalls of legislation