I'll start with the main one.
What is an action camera and what is it for?
About terms. The phrase action-camera is understood as a small camera with a minimum of settings and controls, designed for shooting in various uncomfortable conditions, which dictates the basic requirements that such a camera must meet:
- minimum weight
- ease of mounting (ideally, an action camera can be mounted on anything, including a dog)
- a minimum of controls and, in general, a minimum of operator participation
- dust-, shock-, heat-, waterproof case
- maximum possible time battery life (but not at the expense of weight)
It is indispensable for skydivers and other flyers, skiers, surfers, divers and other extreme sportsmen. I especially want to draw attention to divers: in their case, an action camera can be a very cheap and convenient alternative to a bulky camera in.
Many companies are engaged in the production of action cameras, but here I will tell you about the camera of the company gopro, because it was she who was at my disposal.
GoPro Hero 3 action cameras
GoPro cameras have made their way into our market quite widely, and you can now find them in any more or less serious computer or photo store. They gained a large number of fans and received a diminutive name "goproshka".
The Hero 3 series cameras come in three variants (ordered in descending order of coolness):
- Black Edition
- Silver Edition
- white edition
They differ in capabilities and equipment, but structurally they are exactly the same. My camera, the one that is white (White edition) is the worst, but it also has quite pleasant, pleasing to the eye, properties.
Briefly about specifications ah cameras GoPro Hero 3 White edition:
| bare weight, g | 74 |
| weight in a hermetic box, g | 136 |
| immersion depth in the hermetic box, m | 40 |
| video resolutions | 1920x1080 (25, 30 fps) 1280x960 (25, 30 fps) 1280x720 (25, 30, 50, 60 fps) 848x480 (50, 60 fps) |
| photo resolution | 5 megapixels (2592x1944) |
| timelapse (intervals), s | 0.5, 1, 2, 5, 10, 30, 60 |
| continuous shooting, frame / s | 3 |
| battery capacity, mAh | 1050 |
| battery life without WiFi | from 2 h 15 min to 3 h, depending on the mode |
| WiFi battery life | 15 minutes less than without it |
| governing bodies | 3 buttons |
| display | b/w LCD with mode indication and a couple of digits |
| memory card | microSD up to 64 GB |
| connectors | mini USB micro HDMI |
The camera comes in an incredibly pretentious box, most of which is empty space. The box is crowned with a transparent cap made of thick plastic, under which we see, in fact, a camera in a hermetic box, mounted on a special platform.

Inside the box is:
- sealed box door
- two platforms on double-sided tape (for mounting on a flat and convex surface)
- paper about the guarantee
- a piece of paper saying that there are no instructions here, and everything that is interesting - see the website
- a piece of paper telling us to make sure we have the latest firmware
- some "GoPro(r) Be a Hero" stickers
A huge, too cool box is, of course, overkill, but the lack of a multi-page instruction for downs, and replacing it with a piece of paper that sends us to the site is right, at least they saved a little wood and saved users from excess waste paper, which most of them even won't open.

On the side of the camera are connectors and a slot for a microSD card.

There are 3 buttons on the camera:
- on/off/mode switching
- shooting/photo
- on/off WiFi
WiFi is used to connect to a WiFi remote control or smartphone, on which you can install an application that allows you to remotely control the camera and see on the screen the same thing that it sees. Since I don’t have one or the other, this button annoys me, but if you have the appropriate devices, its benefits are obvious: after all, WiFi drains the battery 10-15% faster, so when it’s not needed, it makes sense to turn it off.
Video and photo quality, examples
Video quality I was satisfied almost completely (when it comes to shooting in good lighting). At least, it is much higher than that of a budget camera. The main mode I use is 720p at 30fps. One minute of video in this resolution weighs about 70 MB.
It's all about, basically, clarity and built-in deshaker which, by the way, works well. But with color reproduction things get a little worse.
The camera very noticeably "softens" the image, giving it a yellowish-pastel tone. Moreover, the color ratio is preserved, and when using auto levels in the editor, the picture acquires the lost blue and becomes much more similar to the original. But this is provided that there are no blockages in the frame, for example, a bright sun. If they are, all adjustments will have to be done manually. Here, for example, is the same frame shot on GoProshka and on a regular camera, see the difference:
GoPro Hero 3 camera features that won me over
Underwater photography
As you know, everyone who has ever snorkeled in more or less transparent waters must have thought that it would be great to capture underwater beauty in a photo or video. Some citizens solve this problem with underwater shooting boxes, to which this site is dedicated.
GoPro owners get an amazing bonus of underwater shooting without any additional devices: because the camera is already supplied with a hermetic box! And what is especially nice here is the price. For example, a GoPro Hero 3 White camera (with box) costs $200, and an aqua box for Canon camera Powershot G15 - over $300.

Let's add here the ability to attach a gopro to any part of the body, freeing up your hands and focusing on scuba diving and contemplating the beauties, and not on whether or not we are currently filming and how uncomfortable it is to paddle with one hand.
This is what a person who knows the problem firsthand tells you: I have ever dived with a Canon SX100 camera in . Unfortunately, I can’t give an illustration of using the GoPro Hero 3 camera underwater yet, but I will correct it.
timelapse
For some strange reasons, the ability to shoot time lapses, with all the simplicity of its implementation, is not available in all cameras. And those in which it is implemented usually cost much more than $200.
 Typical timelapse (3.2 Mb) - not shot on GoPro, but the essence is the same
 GoPro cameras capture time lapses with adjustable frame intervals, which can be selected from the following set of values: 0.5, 1, 2, 5, 10, 30, and 60 seconds.
Actually, that says it all. After all, capturing how quickly the sun sets and how wildly the clouds rush across the sky is, perhaps, the second obsessive desire of all amateur photographers after underwater photography and dew on the leaves.
GoPro Hero 3 White edition camera disadvantages
Yes, this camera, of course, also has disadvantages. I can draw your attention to the following:
1. The camera is designed exclusively for shooting in bright light, ideally on a clear day outdoors. When you try to shoot a video indoors, an incredible amount of noise appears in the frame, and overall quality the video becomes indigestible.
2. Incorrect color reproduction, incl. in bright light (“softening” the picture, as mentioned above).
3. Very strange behavior of the camera when shooting a long time lapse, especially when the light starts to change (for example, the same sunset). From frame to frame, exposure and color balance can jump as they please. In low-light scenes, the camera can increase the exposure as it should be, or it can suddenly decide that enough is enough and set the parameters at which we can see only a black screen for the next thousand frames. Here good example illustrating all these jambs:
4. Camera GoPro Hero 3 shamelessly buggy. Maybe it's just my copy. But the glitches will be below in detail.
5. Of the less obvious and more controversial shortcomings: well, why not make more mounting lugs on the case? This would have made the structure heavier by a couple of grams, but how much more versatile the camera would have become in terms of mounting!
Well, since we're talking about fixing...
GoPro camera mounts - make or buy?
A little pleased with the acquisition, I thought. The two adhesive tape mounts included in the kit - one on a flat surface, the other on a convex one - did not impress me very much, because where to glue them, you still have to figure out, and then constantly live with the thought “what if it falls off?”

As a bonus third mount, a flat platform on which the camera stood during the sale can be used, but in my case this was also not an option, because. the length of the mounting lugs does not allow the camera to be positioned parallel to the site.
Well, there is an easy way here - to buy. After all, a crazy amount of different accessories are sold for GoPro cameras. If you look at the Internet on this topic, then, literally, your eyes start to run wide. And, it seems, each gizmo separately is not so expensive. It turns out expensive when the leading eyes also want this mount on the steering wheel for $ 20 and this for the head for 22 and this for the chest for 30 ... As a result, the amount quickly exceeds 100 bucks. In general, buying is not our way. And I decided to do it myself.
Homemade GoPro forehead mount
The first thing that came to mind was to adapt the mount from a headlamp. No sooner said than done, since there were plenty of substandard flashlights in my household.
Not as beautiful and functional as industrial. The main two drawbacks are the impossibility of quickly removing the camera from the site and the periodic spontaneous loosening of the nuts, accompanied by “pecking”. The disadvantage, in principle, is removable, but for now it will do.

An important point. Pay attention to the metal plates hammered between the fixing ears of the hermetic box. It is necessary to select them so that the total thickness of the plates exactly matches the gap, otherwise, when tightening the nuts, you have every chance to spoil the product!

The disadvantage of this GoPro mount on the forehead is its non-rigidity. When driving on a bumpy road, the camera jumps quite a lot relative to the head, adding jitter in order. In this regard, the fastening must be reinforced with additional straps, although, in my opinion, it is impossible to ensure a sufficiently rigid position on the head with the help of a brace. That is why cameras are very fond of mounting on helmets: a properly selected helmet is practically a single whole with the head.
Homemade GoPro camera mount on the chest and other parts of the body
The forehead mount easily transforms into a chest strap. It is enough to slip it under the belt tightened in the right place.
The mounting platform from the flashlight turned out to be quite versatile. With shorter straps, it can also be attached to places such as the ankle and knee. In general, there is room for creativity.
In the following video, I give examples of mounting the camera on different parts of the body during a ski trip.
For some unknown reason, my camera always turns out to be tilted to the right. Moreover, if at first I thought that I always ride with my head tilted, then I suddenly discovered that the same tilt is obtained when attached to the knee, ankle, chest. What is the catch - it is not clear. Either the camera warps a little towards the battery due to imbalance, or I fixed it on the site with an offset to the right.
Sometimes you really want to attach a bubble level to the goproshka.
Summary
Although the manufacturer will not pay me a cent for these lines, I will say that gopro- an extremely convenient thing, completely worth the money (of course, I was doubly pleased to receive it as a gift, but we're not talking about that). The scope for capturing reality from a variety of angles and in a variety of conditions, this camera provides huge.
For example, there is a video on Youtube where one American DIYer attached it to a radio-controlled glider, on which he descended from a height of about 30 kilometers, so we have someone to take an example from. Although, this do-it-yourselfer is not the only one, Youtube tells us that only the most notorious lazy person has not yet tried to attach a gopro to an airplane / glider / balloon. For example, I’m going to make a report with, but I’ll wait for the wind ...
UPD: Problems with the GoPro Hero 3 White camera: the camera does not turn on
Despite the general enthusiasm for the product, I regret to add the following unpleasant remark here. If in the future there will be problems with the camera, I will add their description here.
Description of the problem
For no apparent reason, the camera suddenly refused to turn on.
The harbinger of strange behavior was the flashing of the WiFi light, which could not be turned off by pressing the corresponding button. It helped only to remove the battery, after which the camera no longer turned on.
How did they do it?
Since the camera is under warranty, I did not try to climb inside, and without this, all options for action boil down to the following:
- remove/insert memory card
- remove/insert USB
- remove/insert battery
- switch on switch off
- shake, knock, blow
And also to all possible combinations of the above actions.
Having resorted to all these measures at the time the problem was discovered, I did not get any effect, caught fire and went to bed, with the idea that now I need to look for warranty documents and ... in short, I lost my camera for a long time.
After about an hour I touched the camera - it turned out to be warm! In horror, I pulled out the battery, already suspecting that there was a short circuit inside, everything burned out, and the battery also died.
The camera worked after I blew into the battery compartment and then inserted the battery. After that, she began to turn on, turn off and shoot without any problems.
Causes of malfunction and disappointing conclusions
What was the reason is completely incomprehensible, but the incident leads to extremely unpleasant thoughts about reliability of GoPro cameras. And if this happened at the moment when it was supposed to be filmed the most valuable video in life?
For example, it was precisely because of these problems that the moment of flight from rescuers was not captured on video at the time, which is rather insulting.
I will definitely unsubscribe about further oddities in the behavior of the camera, although, of course, I really hope that the glitch was a one-time one, caused by the unsuccessful location of the satellites around Jupiter, and it will not happen again.
Continuation of a story
Alas, the disease progressed. About a month after writing the previous paragraph, the camera finally died: it refused to turn on and charge the battery when connected to USB. The “let it rest and try again” method, which worked well earlier, has now failed to produce results.
Recharging the battery outside the camera did not help either, and the methods of reviving the camera, which are in abundance at the request of “GoPro dead”, “GoPro won’t power on”, etc., did not work either.
Tellingly, there were no extraordinary actions with the camera, or its use in extreme conditions. The problem arose upon arrival home after a completely normal past video shooting.
In May 2014, the camera was handed over to warranty repair in Moscow and returned to me only in August. The fault is the motherboard that was replaced. As it turned out during a thorough examination, it was not the board that was replaced, but the entire camera as a whole (some characteristic abrasions on the case disappeared).
One way or another, let's hope that the problems are over. At the moment (December 20, 2014) — the flight is normal.
Instead of a preface
The history of GoPro began during a trip to Australia by Nick Woodman. It was then that he decided to bring to life an idea that he had been thinking about for several years. He dreamed of capturing in photography the sensations that you experience when riding a perfect wave: what is it like to be inside a water tunnel and run your hand through the water that closes above your head? Cameras that could handle such a task in those days were very expensive, and only professionals could shoot such videos. Nick and his comrades wanted to become professionals (“go pro”) and look like heroes (“hero”) in the eyes of others. Thus, he set out to develop the world's first affordable wrist-mounted camera.
Contents of delivery

GoPro Hero 3 comes in a quality plastic box. On a special stand-mount, the camera itself flaunts in a waterproof case, and a rather rich set of accessories is compactly placed under the camera.

Despite such a serious set of accessories, you still have to buy additional ones, depending on the needs of the videographer.


And now the kit itself:
- the camera itself
- case with waterproof (up to 60 m) and conventional (non-sealed) lid for improved sound recording
- flat mount
- 3-way swivel
- stickers for attaching the mount itself to flat (1 pc.) and curved (1 pc.) surfaces
- USB cable
- 2 branded stickers (a la Apple)
- instruction
- guarantee
Appearance
The camera is very light (74 g) and very tiny, even in a bulky waterproof case. Made from impact resistant plastic.

This is what the camera looks like with the iPhone 4S, with not the biggest and longest phone.

On the front there are two indicators (on and shooting), a monochrome display, a power button, which is also one of the control keys, and a slightly protruding lens.

On the left side there are HDMI, microUSB connectors, a slot for micro-SD memory cards (up to 64 Gb).

At the back is a 1050 mAh lithium-ion battery. Enough for 3-4 hours of active shooting.

Photo and video shooting
GoPro Hero 3 Silver Edition has an 11-megapixel matrix, shoots Full HD (up to 30 fps), HD (up to 60 fps) and WVGA (848 × 480) 120 (!) fps. You can shoot excellent slow-motion, even at 60 fps. The image quality is quite good for this sensor size. Detailing starts to suffer in the dark. But in general, for an action camera, GoPro shoots just fine, copes with all its tasks 100%. There will be no videos of their own yet, since the camera has not been used in the conditions for which it is intended. But in the winter they will...
I think many people remember the video when the camera was thrown from the stratosphere, and it did not suffer at all ...
And here is how the camera was used on RedBull Mount biking.
Additional functions
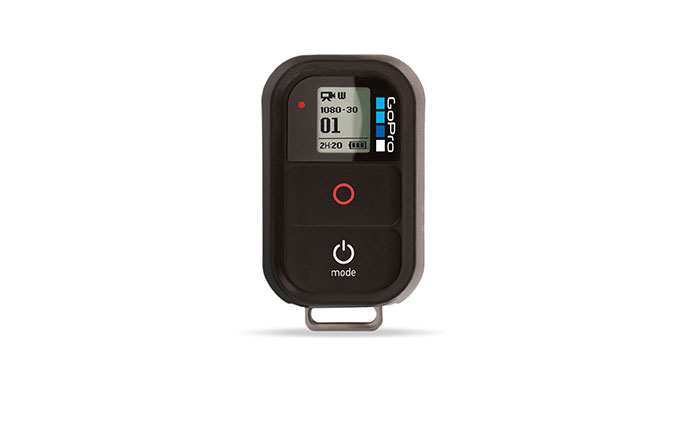
There is a special accessory for GoPro cameras - a remote remote control via Wi-Fi (with Black Edition supplied with the kit). It duplicates the monochrome screen of the camera itself and receives a signal up to 200 m line of sight.
The same function is performed by a special GoPro application, which is available in the App Store, Play Market and even in the Windows Store.

White, Silver, Black… What to take?
As you know, there are three models of cameras that differ in the characteristics of shooting photos and videos, equipment and price. About each in order:
- White Edition: 5-megapixel sensor, full hd (up to 30 fps) and hd (up to 60 fps) shooting.
- Silver Edition: 11-megapixel sensor, full hd (up to 30 fps) and hd (up to 60 fps) shooting + WVGA (848×480) 120 fps shooting, shooting in Protune mode (special shooting mode with extended dynamic color range).
- Black Edition: 12-megapixel sensor, full hd (up to 60 fps) and hd (up to 120 fps) shooting + 2.7K (30 fps) and 4K (15 fps) shooting, Protune mode + remote control remote control via Wi-Fi.
Their post-GoPro Hero 3+ prices are $280, $340 and $440. I consider the Silver Edition to be an ideal option for purchase, since it is unlikely that you will use a Wi-Fi remote control and shoot in 4K. The only plus is 120 fps in hd, you can shoot really cool slo-mo.
Conclusion
The GoPro Hero 3 Silver Edition does a great job not only as an action camera, but also as a regular camera that you can use to capture memorable events, carry it around with you all the time and shoot fun slo-mo videos.
And imagine how cool you would look on skis or snowboard with a camera on your helmet among a crowd of “non-professionals”. It can also be used for a trip to the sea for shooting underwater and not only.

It may seem that if you are not engaged extreme sports, then you do not need such a camera. In fact, the camera is fraught with many hidden features and uses.
GoPro Hero3 Black Edition
And so a couple of weeks ago I bought myself a GoPro Hero3 Black Edition, I will not describe the completeness of the camera and the picture quality of this is full on YouTube.
During operation, the camera heats up well to 55-58 degrees and you can’t hold your finger for a long time. The pain temperature threshold is on average 50-55 degrees, depending on the person and his skin sensitivity, there can be a difference, what is unbearable for a finger for a normal operating temperature chip.
The manufacturer answered the question about heating that a powerful processor is installed in the camera and such heat dissipation is within the permissible range, and that this is the normal operating temperature of the camera.
The base of the lens is metal, and it is this place that heats up strongly, and metal is not a bad heat conductor, and so in the protective case, the base to which the lens is attached is also metal and it passes through the entire box to the outside. It’s not for nothing that the manufacturer used metal there, which means it plays a role heat sink from the camera outside the box where this same metal part is blown by air, wind and cools down.


About the real time of the camera in different modes
Black edition with LEDs off and wifi
1440r 48fps 82min
1080p 60fps 71min
720r 120fps 80min
720r 60fps 86min
480p 240fps 80min
The camera with an Lcd touch BacPac connected to it worked for 57 minutes at 1080p 60fps, which is not bad at all
the camera with BataryBacPac in 720p 120fps mode lasted 190min.
Here is another very interesting article by Abe Kislevitz, who shoots, edits and edits videos with GoPro.
Well, you have become the proud owner of a brand new GoPro HERO3 Black Edition! Luckily, GoPro has added about 137 different video modes(sic!), so every time you start shooting, you can involuntarily begin to doubt whether the video mode is the right one. But I will help you deal with these mysterious modes, the only thing is you need to be a little tech-savvy.
To begin with, let's understand such concepts as video resolution (resolution), frame rate (fps), and video quality. The quality of digital video recording is based on a lot of different values, for example, 1080p on a GoPro is VERY different from the same 1080p on an Alexa camera - and the culprit is not only the image sensor. A lot depends on the algorithm of the processors built into the cameras, thanks to which information is read from the image sensor and written to the SD card. There are various tricks that are included by the developer in the main algorithm of the processor to get all this wide variety of video modes.
So, how does video recording work? The sensor, like a film, captures the image, and the camera reads the necessary area from it - the "window" and the larger the reading area (the larger the window), the greater the load on the processor. To read the sensor completely means to get the fullest possible image coming through the GoPro's widescreen lens (i.e. the reading window is equal to the width and height of the sensor). The sensor in the HERO 3 Black Edition camera has a resolution of 12 megapixels and a 4:3 aspect ratio. So when shooting video in 4k mode, the processor reads information over the entire width of the sensor, but not over the entire height. the output video will be in standard 16:9 aspect ratio. Since it is necessary to receive video in 4k resolution, the processor does not need to compress it and it saves information without changing the image size (that is, we have 4k at the input and output). The sensor reading area in this case is the same as when shooting, for example, in 1080p WIDE mode, however, in the latter case, the processor has to convert the image to a lower resolution at the final stage. The size of the video output also affects the degree of processor load, so when shooting 4k we have only 15 frames per second, and at 1080p (I repeat, despite the fact that the same large area is initially read from the sensor as in 4k) up to 60 frames per second.
Regarding digital video shooting, it is worth mentioning another important term: digital video can be native (i.e., optimal in terms of the interaction between the sensor and the processor) for the camera and not. In the Hero 3 Black Edition camera, the processor reads the maximum possible area from the sensor (for a 16:9 ratio), and then downscales the image to 1080p, and does this 60 times per second (which is optimal for this kind of processor). 1080--60fps and 2.7k are among the most best modes shooting - the processor and sensor interact perfectly with each other, which allows you to get the maximum image quality for this camera. There are also modes when information from the sensor is received by the processor using other algorithms, which leads to roughness (uneven edges of objects, for example, it is noticeably noticeable if there are electrical wires in the distance on the video). Try 1440--30fps and then 1440--48fps and compare the resulting video. The way the processor reads information for 48 and 30 frames is slightly different (high processor load at a resolution of 1440 and also 48 frames per second does not affect the quality in the best way). The same problem can be seen with the Canon 7D when comparing 1080p versus 720--60fps modes. So the image obtained at 720 will be rough (let me remind you that you need to look closely to see these “roughnesses”). the processor is heavily loaded (high resolution means a large number of pixels, and the frame rate determines the speed of reading information from the sensor per second).

Now let's talk about how the sensor reading area and the field of view or FOV (which can be Medium, Narrow and Wide) are related. At 1080p Medium, the information is only taken from the small window in the middle of the sensor, which means we don't see the full picture taken by the sensor through the wide lens - we only see a small part of the middle of the sensor. But initially in this mode, the processor still reads a larger image from the sensor, and then still downscales it to 1080p. At 1080p Narrow, an even smaller area is read from the very middle of the sensor, so there is even less distortion. This time, the size of the area that the processor reads from the sensor is almost equal to the output image, i.e. the processor does not downsize an image that is 1920 x 1080 (remember, the full sensor size is 4000 wide by 3000 high). The image itself, obtained in Narrow mode, looks more blurry, as it contains noise. This output quality is due to the fact that initially a small number of pixels are captured from the sensor - only 1920 x 1080, and in 1080p wide mode a much larger area is captured initially, and then the processor reduces the image (to the same 1920 x 1080), simultaneously removing noise ( i.e. the processes of cleaning the image themselves are present + initially there were more pixels). Narrow mode is like an incredibly zoomed-in version of a normal image (imagine we're only taking 30% of the middle of a photo taken by a GoPro i.e. the full photo would then be 1080p Wide). But you should not compare the Narrow mode with digital zoom, since the image read from the sensor is not converted by the processor, but has the same size at the input and output!


Detailed description GoPro Hero 3 video modes
WVGA--240fps--WIDE-- Well WVGA is WVAGA. If you look closely, the image is quite rough because of the low resolution, but it will do for youtube. If you don't care about video quality, then 240fps will make for incredible slowmotion.
720--60fps--WIDE-- Looks great, but why don't you try 1080--60fps?
720--120fps--WIDE-- I just don't like this mode. The rough edges (if you look closely) are nothing compared to the quality of the 1080--60fps mode, all this is due to the way the processor reads information from the sensor and processes it. But it looks great if your end goal is to upload the video to youtube (because the video has crazy fps).
720--120fps--NARROW-- Super! 120fps! There are no distortions! Absolutely clean video (the processor does not reduce the image received from the sensor)! If there's a mode that screams "I'm not a GoPro", this is it. The video is incredibly clear, as if shot at 50mm. Slowmotion is great! But comparing with 1080 and 2.7k, you will notice how softer the image is in this mode.
960--48fps--WIDE-- Not tested (because it's a rather peculiar format).
960--100fps--WIDE--The quality is the same as at 720-120fps. You can get rid of jagged edges by dynamically stretching to 1080. Otherwise, not a bad mode.
1080--30fps--WIDE-- One of the best modes, very high image definition (similar to 2.7k 30fps).
I tested shooting the same scene at 1080-30 and 2.7k30. When 2.7k was reduced to 1080, the amount of detail and sharpness was almost identical to 1080-30. So I really like this mode, but you have to ask yourself why not shoot in 2.7k mode and have higher resolution video (for the future). Anyway, 1080--30 has one of the cleanest images on camera.
1080--60fps--WIDE-- Loss of clarity compared to 1080-30fps, but it's barely noticeable (the image looks more "soft"). There is a rollin-shutter effect (just a little bit!). Great for shooting fast moving subjects.
Comparing 1080--30 and 1080--60, you will notice that at 60FPS the image is slightly softer than at 30. But you won't notice this if you upload the image to youtube, but how the camera receives this video is slightly different. In the end, I choose this mode for shooting action scenes. The roller shutter effect is noticeably reduced when shooting at 60fps, due to the fact that the exposure time is reduced.
1080--60fps--MEDIUM-- Very clear image, less distortion, video doesn't look like standard GoPro video, great slow motion. Great for shooting with mechanical mounts when the camera moves very smoothly. But be careful with shooting from the first person. in Medium and Narrow modes, camera shake is very noticeable.
1080--60fps--NARROW-- This mode is incredible! Still an incredibly clean image, however, there may be noticeably more pixels and noise. Since the image received from the sensor is not reduced by the processor, the video quality will not be very good in low light. However, the details will be softer. Narrow mode looks like shooting DSLR video, which is very interesting in a GoPro environment. It's funny, but in the final GoPro video, we did not include a few moments shot in this mode, because many simply would not believe that the video was shot 100% on a GoPro.
1440--30fps--WIDE-- I love this mode. Firstly because of the high sharpness and very clean video. If you shoot from the first person, it really seems that you see the world through the eyes of another person. Processing can be tricky because the ratio in this mode is 4:3, but if you know how to dynamically fit an image to 16:9, that's great. So if you're shooting a video that then just relive those moments, this mode is the bomb!
1440--48fps--WIDE-- The high frame rate is great, but if you watch the video in full resolution, you can notice the roughness around the edges. This is due to the processor's high frame rate algorithm. However, few people look at full resolution and peer into the edges. Looks great on youtube!
2.7k--30fps--WIDE-- Amazing! This mod is just crazy! Incredible picture clarity! The image is read from the entire sensor! The only negative is that there is a roll-shutter effect since 30fps. If you shoot in this mode with the camera on something stable on high speeds or in low light, you get pretty good motion blur. In general, in conditions of lack of light, this mode is very good.
2.7k--24fps--CIN-- Same as 2.7k--30fps--WIDE, only with cinematic cropping (top and bottom).
4k--15fps--WIDE-- Great for time lapse (with subsequent refinement in CineForm).
4k--12fps--CIN-- Same as 4k--15fps--WIDE, only lower frame rate and with cinematic cropping.
Protune Mode
For most amateurs, Protune remains an incredible mystery, but professionals use it everywhere. The first thing that catches your eye when using Protune is the subdued color palette. Subdued strong light and accentuated shadows are the product of special curves on the color matrix. The desaturated color makes it easy to blend GoPro footage with footage from other cameras later on. Protune video also has reduced clarity. Take a look at the video recorded with and without Protune. With Protune, the image becomes softer, it may even seem that something is wrong with the lens. But the sharpness you see in standard mode (without Protune) is actually added by the processor during processing. For professionals, the less digital processing the video receives when shooting, the better, since all the necessary options can always be added later, at the post-production stage (for example, it is more convenient to add clarity at the end, when the video material from all cameras is collected, in order to have a solid video in the final, without jumpy clarity, contrast, etc.). Next, let's turn to high level bitrate - it reaches 45Mbps. The bitrate level tells the processor how much information to transfer from the sensor to the SD card - the higher the bitrate, the higher the video quality, but the more space is required on the drive. At low bitrate, it uses special material compression algorithms (such as grouping large blocks of colors) so that the video material takes up less space. The last feature of Protune is the ability to automatically match the color temperature.
Auto This is my lifesaver when I use Protune. The camera does a great job of reading the brightness and light and adjusting the mode as needed. This allows you to get a visually coherent material, which is especially important when shooting in the snow. I'll briefly describe Protune's other color temperature modes below, but I don't really use them much.
3000K This mode should be used in very warm light, such as at sunset or sunrise. In a neutral environment (in a room with white walls), the video will have a blue tint.
5500K This mode should be used for brighter light, during the day for example. With a neutral environment, the video will be in warm colors.
6500K This mode should be used when the sky is overcast, in a neutral environment it has an even softer tint.
cam raw This mode does not correct the color balance, but simply records what the camera sees in a given situation. This mode can give you incredible possibilities for further editing (but videos shot under different lighting conditions will be very mixed, so in post-production you can face a huge amount of work!)
But there are a few important things to note about how Protune works - Protune won't make video better at night! With Protune in the dark, you will see a little more detail than you could with a camera of this size, but the price for this will be the noise that will be present where there should be complete darkness. So as soon as the sun goes below the horizon, it is better to turn off Protune. What's more, there's virtually no digital noise reduction in Protune mode, so you get both more detail and more noise. But as I said, in low light conditions the sensor in this camera works great (for a camera of this size). However, if GoPro added the ability to control the level of noise reduction to the camera, then it would be possible to get even better video in low light.
To summarize, for me - Protune+AutoWB + 1080-60, 2.7K, 1440-30; 1440 48 & are the most popular modes. I am also experimenting with 720-120 Narrow, 1080-60 Medium & and they seem to be great for me too.
GoPro Hero 3 Silver Edition is an action camera (or, as it is also called, “sports DVR”) of the third generation. Compact, somewhere three times smaller than the fourth iPhone, the camera is designed to shoot in the most unpredictable conditions where a conventional video camera simply cannot cope: water, dust, sand.
Thanks to its size and convenient mounts, GoPro can shoot while moving, in free fall or up to 60 meters under the water, even when your hands are busy with something else (wheels, for example). However, selfies while driving are not best use GoPro Hero 3. About where this miracle of technology can be applied, what it is capable of and how it differs from a conventional DVR - read on.
Who cares?
GoPro Hero 3 Silver Edition is the base model of third generation action cameras. It has a wider range of options than the White Edition (for example, a built-in Wi-Fi module), and is limited in comparison with the top Black. It also performs well as a video recording device (30 frames per second at Full HD and 60 at HD quality). Of course, the frame rate in 1080p is not enough to mount slow motion video from the footage, but in 720p you will be able to do it. And a rather suitable “soap box” can come out of a silver GoPro - with an 11 megapixel matrix, it is capable of taking pictures in series or in time lapse mode. In the latter, you set the frame capture rate yourself - from 0.5 to 30 seconds.

Characteristics:
- 11 megapixel matrix
- HD and Full HD video (60 and 30 fps respectively)
- photography in 11, 8 and 5 MP quality
- Protune mode (advanced color management capability)
- monochrome display on the front
- MicroUSB and Mini HDMI connectors
- 1050 mAh battery (enough for a little more than 3 hours of continuous shooting)
- microSD slot (supports cards up to 64 GB)
- built-in Wi-Fi module for remote control of the camera from a remote control (not included in the package) or from a smartphone (also not included :))
What's new?
So, we have already said that new version GoPro introduces Protune shooting mode. Let's talk about it in more detail. In this mode, you can manually select the white balance and increase the amount of video stream capture from the standard 15 Mb/s to 35 Mb/s. Thus, GoPro Hero 3 can be brought closer in terms of shooting quality to professional cameras.
Hero 3 also introduced a video capture mode called Video Looping. It allows you to record a video fragment of a given length an unlimited number of times. In principle, it is useful if you know exactly how long the moment you want to capture will last.
Contents of delivery:
- the camera itself
- plastic protective box
- covers for the box - ordinary and waterproof (up to 60 meters deep). The waterproof cover also keeps your action camera well protected from dust and dirt.
- three-angle hinge
- flat mount
- stickers to fix the mount on flat and convex/concave surfaces
- USB cable
- brand name stickers
- instructions and warranty card
Camera remote control
As we already mentioned, Hero 3 Silver received a built-in Wi-Fi module. In an action camera, it is not needed at all in order to connect to the free Internet in cafes (and it doesn’t have such opportunities in principle). The camera can be remotely controlled via Wi-Fi. To do this, in addition to the camera itself, you can buy a remote control (remote control). It has the same two buttons as the camera and the exact same monochrome display. With the top version, the remote control is supplied, and for the silver version, you will have to pay another 80 euros for it. But this is not the most important thing. The camera can be controlled via Wi-Fi from a smartphone or tablet running Windows Mobile, Android or iOS. The remote control app is available for download on AppStore, Google Play and Windows Store.
IMPORTANT! Before installing the application, update the camera software from the official website! If you ignore the update, only android smartphones will work as a remote control.

And finally
Do not rush to order a camera "over the hill". Remember that the risk of such a purchase is $ 340 + shipping costs thrown to the wind. Firstly, you lose the 12-month warranty, and secondly, you can get an already broken camera.
To shoot video, it is advisable to install a class 10 memory card. It costs more, but it will affect the quality of the video.
One last thing: GoPro Hero 3 Silver Edition performs poorly in the dark, but better than second-generation cameras.
Finally, the long-awaited novelty is in our hands. Of course, it could have appeared earlier (online stores are always ready to serve), but I really didn’t want to face the peculiarities, albeit rare, of the so-called “gray supplies”. Namely - with the lack of localization, flaws software and other unpleasant surprises. Fortunately, there are still official suppliers of this equipment in Russia, and the speed of their work is pleasantly surprising: the third GoPro Hero series officially entered our market shortly after foreign announcements. The difference of a few months can be considered insignificant - it is enough to imagine the difficulties that you need to go through to get just one certificate.
But let's leave the bureaucratic obstacles to those who, by the nature of their activity, are called upon to overcome them. After all, there is a much more interesting reason for the article:
Design, technical characteristics
The reader should be warned: in this article you will not see fascinating footage taken in the stratosphere. There will be no wrecked cars or broken limbs here. Exotic ways of attaching a GoPro to anything are also up to the owners of such cameras. We will focus on learning technical features apparatus: controls, shooting modes, methods of processing the received video. Everything that is not covered in the user manual or on the product web page.
Traditionally, the GoPro Hero camcorder comes in several variations, or, if translated edition Literally, publications. They differ not only in completeness. Before buying, it is recommended to carefully study the characteristics of each "edition" - this can be done on.
But everything is much simpler for us: the camera kindly provided for testing belongs to the "older" version - GoPro Hero 3 Black Edition.

The camera comes with a serious set of accessories (looking ahead, we note that even such a collection is probably not enough to implement all the ideas):
- multiple mounts including pad
- waterproof housing
- replaceable back cover for the case (not sealed, with holes for better sound recording)
- radio remote control with charging cable
- Mini-USB-to-USB cable
- paper instruction in Russian

The concept of the camera remains the same as in . Design - yes, slightly changed. The battery has ceased to resemble a telephone, now it has the shape of a brick. Of course, the old batteries will no longer fit the new camera.

The included battery enables continuous recording for 95 minutes at 1280×720 50p with Wi-Fi off. Wireless communication takes a lot of energy, the battery is depleted literally before our eyes. Not knowing this, the author, going to shoot and having charged the camera, did not pay attention to the flashing blue indicator, and arrived at the shooting site with an almost empty battery. It turns out that turning off the camera is not enough - you also need to make sure that Wi-Fi is also turned off: adapter wireless network in the camera turns on and off separately.
The body of the device, as usual, is made of impact-resistant plastic. On one of the ends there is a Wi-Fi on / off button, on which the corresponding icon is applied.

The camera screen still does not have a backlight - this is a serious minus. And, just like in previous versions, navigation through the menu is carried out with two buttons. This way of managing parameters cannot be called comfortable; however, it is a matter of habit. It is enough to work closely with the camera for a week to change, for example, the recording mode with your eyes closed, focusing on sound signals and the number of clicks. But, we repeat, for a beginner such an unobvious method of control may seem inconvenient and antediluvian.

The service interfaces of the camera are covered with a removable cover: Micro-HDMI, Mini-USB, and a slot for a microSD memory card (up to 64 GB).

The remote control screen also does not have a backlight; in active mode, this screen completely copies the screen of the camera itself, repeating all the set parameters and icons. Device information is exchanged over the same Wi-Fi. The remote control works stably, the maximum distance at which the camera is able to receive a control signal and transmit information can be 200 meters in line-of-sight conditions.

To recharge the remote control, a special connector of a cunning shape is used; charging is carried out from a USB port or from a similar adapter. During charging, remove the metal eyelet from the remote control, for which the remote control is designed to be attached, in order to avoid losing it.

The main technical characteristics of the video camera are given in the table:
| Dimensions, weight | (W×H×D) 59×41×29 mm, 77 g with battery |
| Battery life included in the kit | up to 95 minutes of continuous 1280×720 50p video recording with Wi-Fi off |
| Carrier | microSD card (up to 64 GB) |
| Video formats | |
| Photo Format | JPG, 12 MP, 7 MP, 5 MP |
| optical zoom | |
| Interfaces |
|
| Other characteristics |
|
Video/photography
First of all, you need to know with what resolution it makes sense to shoot. It would seem: if you want to save events with maximum detail, use the 4K available here. But the frame rate when shooting with this resolution, alas, is not yet high enough - only 12.5 frames per second (hereinafter we will use the PAL standard as the main one in Russia and most other countries).
But how to measure the resolution of a given camera? The test chart we have, printed on an A3 sheet, is not suitable for this. The fact is that the lens of the camera in question has a fixed focal length. Simply put, objects as far away as a meter from the lens and up to infinity will be in focus; objects that are closer than a meter will leave the focus area, blur.
What's the way out? Of course, a huge-oh-ohm test chart! True, to print (and place) such a rather expensive. In addition, it doesn’t make much sense: after all, the main zones of the table, by which you can quite accurately determine the resolution of the camera, fit only on six sheets of A4 format (the entire table could have been 3 meters wide).
To print the required six sheets, we split the "virtual" table into sheets. After that, only the desired area was printed - in the next figure it is highlighted in color.

Having glued the resulting sheets and placed them on a vertical surface (wall), we thought about it. Dilemma: How far away should you shoot? After all, it is required not only to remove this object. The main thing here is to maintain the desired proportions. It would be possible to use a simple calculation, but alas, the optical distortions introduced by the camera lens are so strong that the usual geometry is not suitable here. There is only one way out - sequential shooting made from different distances from the table will help us. Armed with a tape measure and choosing a step of five centimeters, we made the necessary shooting, making several dozen takes.

Now it is enough to combine the freeze frames obtained from each take in the graphic editor with the image of the table itself in the original and select the most suitable frame in size, where the key table objects of interest to us coincide with the original ones in location and size. Ready!

The shooting was carried out, of course, in 4K 3840 × 2160 mode. This mode was chosen because the aspect ratio in it is standard 16:9 - exactly the same as in the test table. The calculation showed that the actual resolution of the camera reaches 2800×1600. Here it is hoo! I recall Carlson with his sincere surprise: “Such a big housekeeper - in such a small box?” What is this processor inside our camera that allows you to encode a picture with a similar resolution? Look, it heats up like an internal combustion engine? Let's measure this parameter.

This photo was taken half an hour after the start of recording in 720p mode, while the camera was in a room with a temperature of 24 ° C. As practice has shown, it is possible to avoid reaching a critical temperature by refusing to use Wi-Fi and providing the device with the maximum possible ventilation. That is, shooting in the heat with a camera placed in a sealed box threatens to overheat and then turn off the device - this aspect is covered in detail in the user manual. One thing pleases: due to the presence of a thermal sensor in the chamber, you should not be afraid of the device breaking due to overheating.
But back to resolution. So, 2800×1600. Those numbers are pretty damn similar to the frame resolution you get when shooting in 2.7K mode. Conclusion: you can get maximum video detail and at the same time avoid unnecessary waste of disk space by using one of the 2.7K modes: 2.7K (2716 × 1524, 16:9) or 2.7K Cinema (2716 × 1440, 17:9) . Moreover, the frame rate of such a video is already close to normal: 25 or 24 fps.
You can visualize the difference in the detail of each of the recording modes using the following video:
To view in full resolution, click on the button "Original size"
A huge number of shooting modes available in the camera in question makes it necessary to display their description in a separate table - it is impossible to fit all the parameters in the main table of technical characteristics. Here you can also download still images and original clips shot in these modes.
| Mode | Video resolution | fps (PAL) | Codec, options | Viewing angle | Protune | Download |
| 4K Cinema | 4096×2160, 17:9 | 12 | AVC [email protected] 50 Mbps | Wide | Yes | frame, roller |
| 4K | 3840×2160, 16:9 | 12,5 | AVC [email protected] 45 Mbps | Wide | Yes | frame, roller |
| 2.7K Cinema | 2704×1440, 17:9 | 25 | AVC [email protected] 45 Mbps | Wide | Yes | frame, roller |
| 2.7K | 2704×1524, 16:9 | 24 | AVC [email protected] 45 Mbps | Wide | Yes | frame, roller |
| 1440p | 1920×1440, 4:3 | 48 | AVC [email protected] 32 Mbps | Wide | Yes | frame, roller |
| 25 | Yes | frame, roller | ||||
| 24 | Yes | frame, roller | ||||
| 1080p | 1920×1080, 16:9 | 50 | AVC [email protected] 32 Mbps | wide, medium, Narrow | Yes | frame, roller |
| 48 | AVC [email protected] 32 Mbps | Yes | frame, roller | |||
| 25 | AVC [email protected] 20 Mbps | Yes | frame, roller | |||
| 24 | AVC [email protected] 32 Mbps | Yes | frame, roller | |||
| 960p | 1280×960, 4:3 | 100 | AVC [email protected] 32 Mbps | Wide | Yes | frame, roller |
| 48 | AVC [email protected] 32 Mbps | Not | frame, roller | |||
| 720p | 1280×720, 16:9 | 100 | AVC [email protected] 32 Mbps | wide, medium, Narrow | Yes | frame, roller |
| 50 | AVC [email protected] 20 Mbps | Not | frame, roller | |||
| WVGA | 848×480, 16:9 | 240 | AVC [email protected] 32 Mbps | Wide | Not | frame, roller |
Here you should decipher what the column called "Protune" means. This shooting mode is activated in a separate item of Capture Settings, and there is a choice between automatic white balance, manual setting (3000 K, 5500 K and 6500 K) and shooting in Cam RAW mode. The latter mode, apparently, allows you to get the picture as it is, without software color processing. We will deal with this feature of Protune a little later.
It can also be concluded from the table that some shooting modes allow the use of different frame rates. It is hardly necessary to convince the reader to always use the highest possible frame rate, especially when shooting fast-moving subjects. And since we're looking at an action camera, that's just the way it's supposed to be done.
Another burning question concerns angles. Those that are now for some reason not indicated in degrees, but have a more understandable designation: Wide (Ultra-wide), Medium (Medium) and Narrow (Narrow). Let's try - clearly, of course - to see and evaluate the difference in the angles of view of the lens. As can be seen from the above table, not every recording mode allows you to change the angle. Just two: 1080p and 720p. In general, these formats are the most popular today, so in the future we will shoot in the older one, 1080p. With the highest possible frame rate, of course.
To measure angles, a lot of free space is required. And therefore we will go to the open air, armed with a shovel for clearing snow (we are in Russia, but now it’s not summer).
What's the verdict? It looks like the camera has a 150° angle of view in Wide mode, 110° in Medium mode, and narrows it down to 80° in Narrow mode. The most preferred is the medium mode, Medium. And the field of view is wide enough to cover the main scene, and at the same time, geometric distortions do not hurt the eyes as much as in the maximum Wide mode.
By the way, about distortions. How to fix them? The answer is unlikely to please: it is difficult to overcome this distortion. However, it is possible. For example, in Photoshop. Do not be surprised, this program works well with video (Processing Video in Adobe Photoshop: Part 1, Part 2). There is also a way to correct distortion using open source software: a filter for VirtualDub. Unfortunately, in both cases, the video will have to be recoded or repacked into a format that is understood by the corresponding programs (Photoshop and VirtualDub) before processing.
However, you can do without preliminary recoding or writing AVISynth scripts. So, in After Effects, there are several ways to partially overcome distortion, here is one of them:

As we have already seen, the camera in question has a rather big MOS-matrix. In this regard, it is quite reasonable to expect a terrible rolling shutter from her. Let's check this, we will shoot the passing transport in different modes.
 |  |
 |  |
If there is a rolling shutter, it is so weak that it does not attract attention even in the maximum 4K mode. Not every camera is capable of this.
The WVGA mode also promises considerable benefits. Recall: shooting in this mode is carried out at a frequency of as much as 240 frames per second. By slowing down such a video by 10 times, you can get a result that is rare in terms of spectacularity. Let the following scenes be rather banal, but the potential of such shooting is not difficult to understand.
Now, as planned, consider the Protune shooting mode. The manufacturer promises that the video shot in this mode lends itself much better to color correction - let's make a preliminary conclusion that the Protune mode allows you to shoot with an increased dynamic range. To confirm this theory, we will conduct another experiment: we will shoot a contrasting scene.
Indeed, dark areas look more distinct with Protune turned on, and, apparently, a lot of color and light can be “pulled” out of such a wide-range video. There would be desire, skill and time. Or rather, a lot of time.
How are these modes different? technical terms? Does the camera in Protune mode manage to encode video with a higher bit rate? No, in fact, everything turns out to be much simpler. The files differ only in bitrate (when Protune is on, it is 1.5 times higher) and GoP length (Group of Pictures, 15 frames in normal mode and 8 frames in Protune mode). Below is the keyframe rate for both of these clips.

As for color correction, it is not only possible, but necessary. The reader has already noticed that the camera noticeably “yellows”. In any scene, wherever and in whatever conditions it was filmed, a yellowish coating is clearly visible. Maybe the lens coating is to blame. Be that as it may, it is simply necessary to get rid of yellowness. This is easy to do in any video editor.
|
|
|
|
| Without correction | With correction | Without correction | With correction |


Due to the loop recording mode in the camera, the device can be used as a car DVR. True, in order to simultaneously shoot video and recharge the camera, you need a box with open interface holes - after all, the camera itself does not have any attachments, it can be attached to something only under one condition: when it is in the box.
After reviewing these videos and still images, we can say with confidence: in terms of detailing, none of the car DVRs that exist today can be compared with this video camera.
At night, under street lighting, the camera also behaves very well. In the case of video recording, the fixed focus of the camera plays an extremely positive role.
Interval shooting is only possible in photo mode: the camera is capable of taking photos of a user-specified size at the following intervals: 0.5, 1, 2, 5, 10, 30 and 60 seconds. Thanks to this mode, it is possible to get a pretty beautiful video sequence by combining photos in a video editor.
A lucky chance made it possible to test the considered camera in underwater photography. Of course, in an artificial reservoir. The result is quite expected: flawless operation in all modes and, most importantly, the almost complete disappearance of distortion. In principle, it is understandable: water is an excellent corrective lens.
The photographic abilities of the camera are worthy of respect, but only in terms of excellent detail. Of the shortcomings - of course, the wrong geometry and the lack of a small depth of field so beloved by many photographers (or those who consider themselves photographers) and, accordingly, "bokeh".

Software
The software built into the camera on an external monitor looks much more convenient and logical than on the screen of the camera itself. If not for one thing: menu navigation is possible only in one direction - forward. Damn missing another button that would allow you to go back instead of scrolling through the entire menu again and again with the risk of missing again.
The camera's wireless adapter creates an access point with a specific name when you turn on the GoPro App mode. To control the camera using a smartphone or tablet, you need to install the GoPro App on your smartphone (versions for both iOS and Android are available), connect the device to a specified point, and launch the installed application.
It's a pity, but on the Android devices we have, this application did not really work. Three different devices were tested: a smartphone, a tablet and a media player running Android 4.0. The connection was established, the application was launched, but things did not go beyond this: despite the seemingly reliable connection and even the appearance of a video stream in the viewing window, the application stops working after a few seconds, displaying a message on the screen about the need to check Wi-Fi for correct connection. Why check it, if the camera even manages to display a picture - it's not clear. We hope this bug will be fixed soon.
No matter how much we would like to evaluate the work of the application in the iOS version, we do not have such a device in the foreseeable environment.
Comparative testing under the same conditions
In the almost complete absence of light, it seems much more preferable to shoot without using Protune. The actual resolution of the camera has already been mentioned above - it approaches 2800x1600. This figure is an absolute record, not a single amateur full-format camera has such permissions today - what can we say about such microscopic bricks as the hero of this review.
conclusions
Surprised by the camera, do not say anything. Honest 2.7K at a tolerable 25 fps - isn't that a miracle? As for the 4K mode, it is introduced here rather “for show”, because the real resolution does not reach such an indicator. And the frame rate in this mode is not at all conducive to its use.
Second important positive moment- the presence of the Protune mode, in which the image is not subjected to color correction (often incorrect) and software noise reduction, but is taken directly from the matrix.
Finally, one more aspect: rolling shutter. It is practically non-existent, which is at least surprising. A matrix with so many pixels should - no, just have to produce the most terrible rolling shutter in the form of slanted lines and a jelly-like picture. However, we do not observe this.
Speaking about the minuses that characterize this device, two points should be noted. The first is the risk of overheating. True, only theoretical. In practice, during testing, we never encountered overheating - but it’s understandable, it’s winter outside. The second serious minus is inconvenient, archaic control. This two-button blind control is long overdue (though some might consider it a GoPro-only gimmick). And finally insert some kind of backlight into the screen!
These shortcomings are quite serious, but other qualities of the camera, positive, undoubtedly outweigh them: excellent resolution, minimal rolling shutter, the presence of Wi-Fi. And they do not just outweigh, but force us to mark this device with our award. Quite deserved.
The official cost of the GoPro Hero 3Black Edition camcorder in Russia is 20,500 rubles; current average price(number of offers) is $369(10).


How to disable ads on Android: remove pop-up ads
The Russian received a term and a million fine for "piracy Negative consequences of the law
Identification of key factors
The criteria for classifying organizations and individual entrepreneurs as small and medium-sized businesses have changed
See what "Royalty" is in other dictionaries Pitfalls of legislation